Image of the December 2012 Wilderness Magazine Cover Read more from the
December 2012 Issue
Home / Articles / National Parks

28 National park trips: national parks I-R

Lakes Adelaide and South America and Moraine Creek from Barrier Peak. Photo: Mark Watson

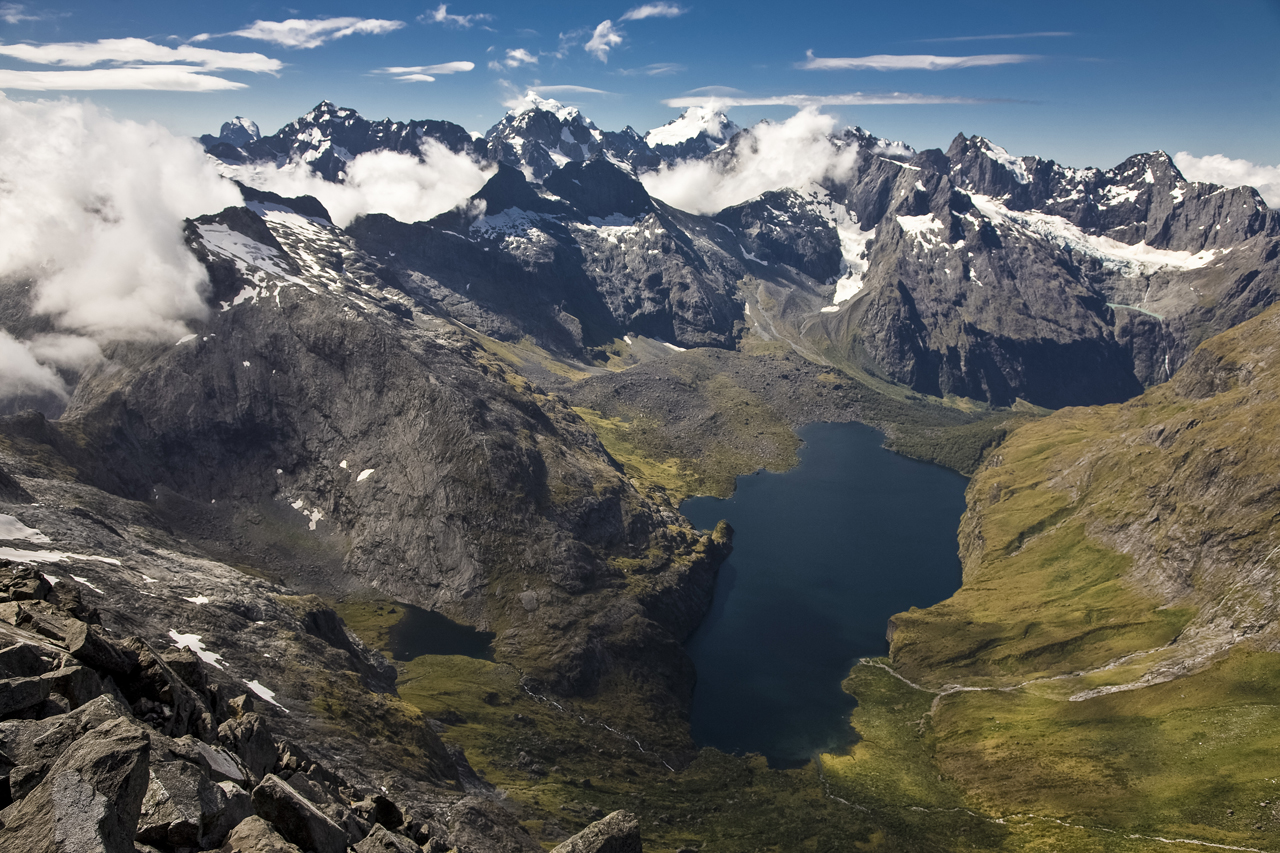
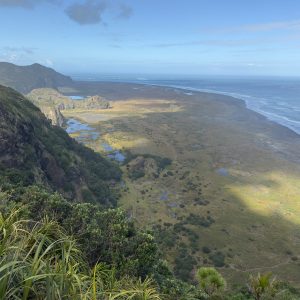
Moraine Creek, Fiordland National Park

An alpine crossing without peer, the Moraine Creek route over Fiordland’s Darran Mountains between the upper and lower Hollyford Valleys passes through sheer and spectacular country.

It also offers the finest in alpine rock bivouacs with either the cosy Gills Biv or the more spacious Phils Biv, both sitting amongst alpine flowers and tussock beneath the towering 700m-high north face of Marian Peak. An optional camping spot is Tent Flat, above the Lower Hollyford, where there are spacious tussock flats and ribbon-like waterfalls cascading off nearby cliffs.

The crossing can be made in either direction and is best done with a day in hand to spend at the rock bivouacs. There’s a lot to take in at this gigantic alpine cirque – the rock bivouacs are ringed with some of the Darrans most well known peaks: Barrier, Marian, Sabre and Adelaide and look out over the sparkling waters of Lake Adelaide. Sentinel (1741m) can also be climbed from here via its south-east ridge from Lake South America. It’s non technical, but does require ice axe and crampons for the névé near its top.

This trip’s not just about the destination though; to travel here requires crossing two alpine passes and negotiating the tricky and exposed Gifford’s Crack route to or from Adelaide Saddle. The crossing is mostly unmarked and involves a lot of off-track travel on exposed ridges, dry riverbeds, moraine and snow grass.

A trip of a lifetime for some, this crossing requires experience in alpine terrain and route finding and a head for heights. Outside of mid-late summer an ice axe and crampons should be carried. Some parties might need to rappel or belay on Giffords Crack and on the traverse beneath Barrier Knob.

Access From the Lower Hollyford Rd Moraine Creek
Time Three+ days
Map CB09

Lake Mavis and Tarn Col, Arthur’s Pass National Park

Surveying Taruahana Pass and Tarn Col from the ridge above Lake Mavis. Photo: Richard Davies

Surveying Taruahana Pass and Tarn Col from the ridge above Lake Mavis. Photo: Richard Davies

Beech forest and craggy tops is the quintessential Arthur’s Pass experience. A classic trip to make the most of this starts up the Mingha Valley and follows part of the Coast to Coast route.

You might not be as fast as the athletes, but don’t worry, you are about to do something so much better. Lake Mavis is nestled on a bench 600m above Goat Pass and below Mt Oates.

From the lake, it’s time to get your groove on for some bouldery ascending. Step on a million rocks and cross to the Edwards on the broad shoulder north of Pt1978. From there it is a fun descent – scree, bluffs and more chunky scree – to Taruahuna Pass.

There is quite a story here. Taruahuna Pass is actually the remains of a large part of Falling Mountain which came down in the 1929 Murchison earthquake. It is a short and sweet climb up to Tarn Col which then links with Walker Pass and a track into the Hawdon – Arthur’s Pass beech forest: tramping at its best and a great way to finish a neat trip.

Access From the Mingha River, just north of Greyneys Shelter
Time Three-four days
Map BV20, BV21

Matemateaonga Track, Whanganui National Park

The story of Whanganui National Park is as much one of human endeavour as it is of the landscape.

The Bridge to Nowhere is the most well-known example of how settlers tried – and failed – to tame this landscape. Much less visited, though no less interesting a story, than the famous bridge is the Matemateaonga Track.

Originally a Maori trail across the ranges, a dray road was cut prior to the First World War to make a direct link between Stratford and Raetihi.

Today, trampers can enjoy the gentle gradient and all-weather route through to the Whanganui River. The forest is incredible, and Mt Humphries is a side trip worth doing for extensive views from the small clearing on top.

Access From Upper Mangaehu Rd
Time Three-four days
Map BJ31, BJ32

Mutton Cove, Abel Tasman National Park

Mutton Cove offers ‘world’s end’ camping opportunities. Photo: Pat Barrett

Mutton Cove offers ‘world’s end’ camping opportunities. Photo: Pat Barrett

For a quiet, remote coastal setting it would be hard to find a more agreeable location than Mutton Cove and adjacent Anatakapau Bay in northern Abel Tasman National Park.

These two bays are on the coastal track, about two hours north of Totaranui, but as this section of the Great Walk is not always added onto visitor’s itineraries it is much less crowded than the more popular bays to the south. It also has a wonderful sense of isolation, no doubt in part due to the fact that it lies so close to Separation Point – the granite headland that divides Tasman Bay from Golden Bay.

Camping here feels like world’s end, so it is worth taking perhaps a night or two to immerse yourself in this magnificent oceanscape.

Access From Totaranui
Time Two+ days
Map BN25

Ngatau Valley, Mt Aspiring National Park

Trampers in Mt Aspiring National Park’s remote Ngatau River. Photo: Richard Davies

Trampers in Mt Aspiring National Park’s remote Ngatau River. Photo: Richard Davies

The Ngatau is a little known, but achingly beautiful valley in South Westland. It is not as big, as rugged, nor as legendary as its neighbours but therein lies its charm.

It is reached reasonably easily (for a wilderness valley) on tracks up the Okura Rvier, but getting out of it is more challenging – unless you retrace your steps.

With normal flows, the Okura is straightforward to tramp alongside, using cattle tracks and the riverbed to negotiate wild and dense South Westland rainforest. This is Charlie Douglas country and is simply breathtaking.

The key to getting up the Ngatau is to find the right deer trail. Once you’ve got it, follow it up past some of the coolest place names in New Zealand. Camp at Tinkle Rill, anyone?

Access From Turnball Rd, east of Okura
Time Four+ days
Map BY12, BZ12

Paparoa tops, Paparoa National Park

Searching for a campsite on the Paparoa tops. Photo: Richard Davies

Searching for a campsite on the Paparoa tops. Photo: Richard Davies

The Paparoas is tough country, with just a few tracks to get you started and some pretty hairy bluff country (even down in the lowlands).

A good way to get a taste for the park is to use the Croesus Track to gain 1200m from the coast to the tops. From here, a poled route heads north from Mt Ryall before descending to Moonlight Creek.

Plenty of campsites exist along here, and a careful search should yield usable water. If you get good weather, and good visibility (admittedly a rarity) you won’t want to come down! So spend a few days and explore, it’s a spectacular range.

Access From SH6, opposite Cargills Rd
Time Two+ days
Map BT19, BT20

Lake Poteriteri, Fiordland National Park

Crossing the Rata Burn near Lake Hauroko.

Crossing the Rata Burn near Lake Hauroko.

Lake Poteriteri is the largest lake in New Zealand that doesn’t have road access. There is a small hut here, and the lake can be reached by following tracks the whole way, with the option to work it into a spectacular trip if you’re prepared for a little bit of off-track travel.

The Hump Ridge Track near Tuatapere is a good place to start, with a beach walk as far as Waikoko Stream and Track Burn Hut. From there, take the Hump Track (not the private Hump Ridge Track) to The Hump, and descend to Teal Bay Hut on Lake Hauroko.

From there it is a day, all on track across the Wairaurahiri Valley to Lake Poteriteri. This is Fiordland at its best – truly remote but not difficult travel. The birdlife at Poteriteri is sumptuous and there are extensive pest control measures in place, including gates on the bridges to stop possums from penetrating this area. If you are just going to head back the same way I’d recommend stopping for a day at the Lake. The sandflies are a nusiance, but places like this are good for the soul.

Access From the end of Papatotara Coast Road
Time Four+ days
Map CF06, CF07

Mt Rakeahua, Rakiura National Park

View to Paterson Inlet from the summit of Mt Rakeahua. Photo: Rob Brown

View to Paterson Inlet from the summit of Mt Rakeahua. Photo: Rob Brown

At 681m, the view from the summit of Mt Rakeahua is one of the most panoramic on Stewart Island. If you are lucky enough to strike a fine day, and the persistent wind drops enough to hang about on the tops, it’s a rewarding side trip from the remote South-West Circuit track. From the old eight-bunk NZFS Rakeahua Hut, the climb is further than it looks on the map. Allow 3-4hr from the hut to the summit and even though the return is much quicker, it’s still a reasonably solid day out.

The complete view on the summit is somewhat impaired by the presence of a large telecommunications tower, but if you ignore that and look out towards Paterson Inlet there is the unmistakable feeling of wildness.

The summit area is one of the few highland breeding areas for the critically endangered southern sub-species of the New Zealand dotterel (Charadrius obscurus) and there is a reasonable chance you’ll see one during the nesting season. While their northern counterparts tend to nest on sandspits and near estuaries, the southern ones prefer to nest high on the tops; highly unusual behavior for a shore bird. There are estimated to be just 75 individuals left and they are threatened on Stewart Island by predators such as wild cats and rats. Numbers are being held stable on the island by limited, but ongoing predator control.

Access From Halfmoon Bay
Time Five+ days
Map CJ09, CH09, CH10

Rome Ridge, Mount Rolleston, Arthur’s Pass National Park

Approaching the Low Peak of Rolleston at dusk on a winter’s evening. Photo: Mark Watson

Approaching the Low Peak of Rolleston at dusk on a winter’s evening. Photo: Mark Watson

Rome Ridge is the most elegant climb on Mt Rolleston  and one of the best, easily accessible winter ridge climbs in the South Island. Most parties complete this classic climb in a day, descending via the Slide and returning to the highway via the Otira Valley. However, with more time and a little more weight the trip can be split into a two-day climb giving you more time to enjoy the mountain and take in amazing views of the Southern Alps.

There are camping options along the ridge before it steepens, but the spot with the best view in the park is the summit of Low Peak, which is spacious enough for a tent. From a camp here, you can climb to the High Peak (2275m) of Rolleston in firm (safer) conditions the following morning, before taking the standard descent down the Otira Valley.

Rome Ridge is graded 2-, but parties commonly use two tools on the steeper, upper section of the ridge and some will belay here, depending on confidence and experience. The route starts on the Coral Track from Highway 73 and climbs steeply through alpine beech forest before emerging above the bushline and onto the ridge which is followed to Low Peak.

Access Coral Track, opposite Bridal Veil Creek, just north of Arthur’s OPass Village
Time Two days
Map BV20