Learn how to study the map of your upcoming trip before you depart.
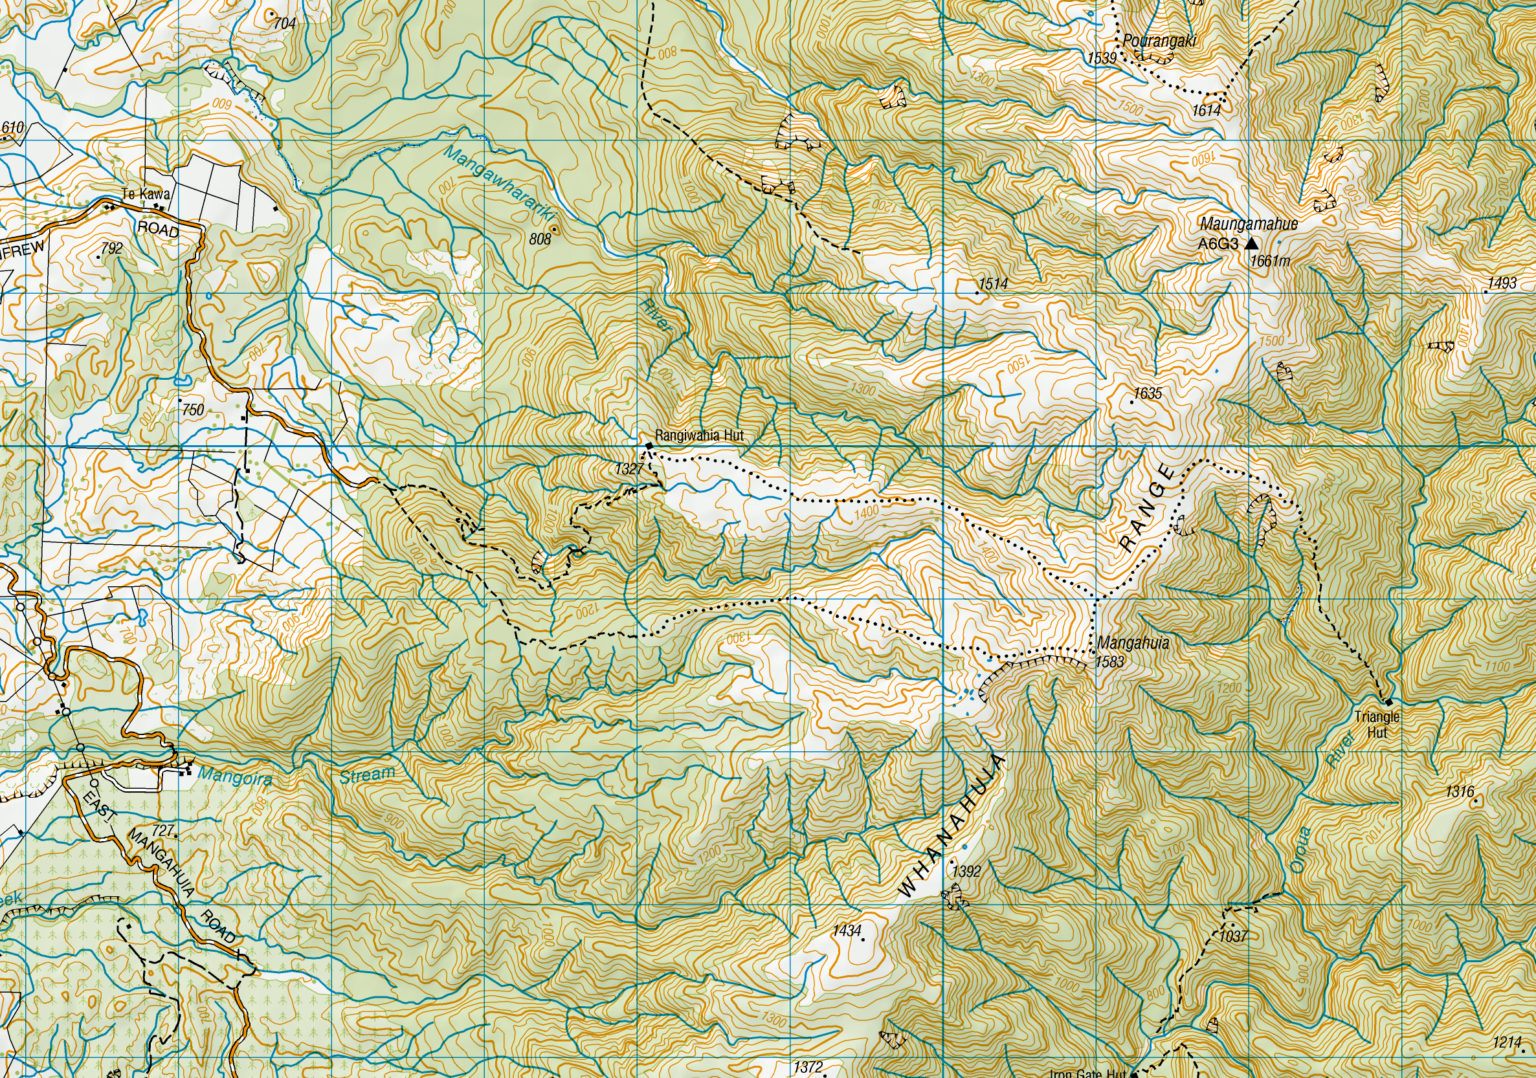
You may be planning to walk to Rangiwahia Hut and considering whether to do the loop or return by the same route. By studying the map you will find clues to the type of terrain and distance involved and this map may help you decide which route to take. Here’s what we can determine.
Contour lines: Each brown contour line represents a difference in height of 20m. The road end is at 820m and Rangiwahia Hut at 1310m, an overall climb of 490m. Half-way along, there is a descent of 80m, which needs to be regained. While the contour lines are close together, indicating it is steep, the track zig-zags back and forth making it easier. The loop features much wider spaced lines, indicating an easier gradient.
Gridlines: With the track switching back and forth it is hard to estimate the distance to the hut, but it is a bit more than 4km. It is easier to estimate the rest of the loop. This looks like it would span approximately nine blue grid lines, so about 9km.
Tracks: The track to Rangiwahia Hut is indicated by dashed lines. After the hut, they become dots indicating a poled route. It takes more skill to navigate a route than a tramping track.
Water features: Only one creek crossed by the track has significant feeders, indicating it could easily be affected by significant rain. Fortunately, this creek is bridged – shown by a double-ended Y. Just past Mangahuia is a series of blue splodges, one quite close to the track. These are tarns, or small alpine lakes. The water is stagnant so not generally drinking quality.
Slips and cliffs: On the way up, you can see a ‘thumbprint’ indicating a slip (shown just down from the bridge). This is shown as about 100m high and the track crosses above this. Slips like this are prone to further slipping and the track may get rerouted further above the slip each time. If you continue on the loop, just after Mangahuia is a long line of ‘teeth’ indicating a cliff edge. This could slip and affect the track not far from the edge.
Vegetation: At around 1100m, the background colour changes from dark green (native forest) to light green (scrub). Scattered around here are large green dots indicating big trees in the scrub. Just before the hut the background colour changes to white/grey indicating a lack of vegetation above the bushline. It will be exposed to the wind here and prone to grey-out conditions. A significant part of the loop is above the bushline.
Should you walk?: If you’ve studied the map before going on this trip, you may decide you’re not keen on such a big climb or to tackle a route. You may be afraid of heights and decide you can’t skirt the slip or the cliffs, especially if recent heavy rain may have caused track damage. If strong winds or rain are forecast, you may decide you don’t have the skills to attempt the section above the bushline. Is it safe to do the trip given the forecast snow levels? In hot conditions, remember to take enough water because you won’t be able to fill up after the hut. However, if you decide you have the fitness and skills to complete the whole loop, you will be mentally prepared for the trip.
– Heather Grady is an instructor with Outdoor Training New Zealand