Image of the February 2020 Wilderness Magazine Cover Read more from the
February 2020 Issue
Home / Articles / Skills

Using a compass when there is no visibility

It's easy to miscalculate the distance you have travelled and accidentally head off down a wrong spur.
Low cloud, thick bush, heavy rain or snow can prevent you from taking bearings on landmarks as you travel. Even so, your compass can still help. By Noel Bigwood

Imagine trying to identify where you are along a track, or confirming you are on the right track. If a bearing is taken of your line of travel it can be matched to the map to help determine where you are. However, taking a single bearing may not be enough. On a 1:50,000 scale map, some twists and turns may be concealed and several bearings may be needed.

To take a bearing:

  1. Face the general direction of travel.
  2. Hold the compass flat with the direction of travel arrow facing away from you.
  3. Turn the dial until the red magnetic needle points to the magnetic variation. (This is read from the map and is the difference between magnetic north and grid north).
  4. Read the bearing. This is the number around the dial in line with the direction of travel arrow.
  5. As you walk, periodically take your bearing. After two or three checks you will be able to calculate an average bearing (add the bearings and divide by the number of bearings you have taken).
  6. When you have set the compass to the average bearing, you can match it to the map.

Match your bearing to the map

  1. Without turning the dial, lay the compass on the map. Line up the red and black orienting lines in the base of the compass with the blue north-south grid lines on the map. Ensure the red end of the orienting lines points to the top of the map.
  2. Slide the compass around the map. Look at the track where you think you are walking and see if there are sections that align with the edge of the compass.
  3. Once you have the edge of the compass lined approximately along a likely track section,check the red and black orienting lines are still in line with the blue north-south grid lines. Just because you have found a track section that lines up, it doesn’t mean it is the right one. Check if there are similar tracks or track sections that you may be confused with.
  4. Once you have identified the likely track section, check if the map shows an upcoming bend and estimate how long it will take for you to reach it. When you reach a bend in the track, check the new bearing. Does this align with the expected bearing? You may need two or three checks to decide on an average bearing for this new bearing.
  5. Another way to check is to look for something that intersects with the track such as a stream or a track junction. From this intersection, take bearings in all directions (along all directions of tracks and streams). Match these with the map – do they all match the point you think you are at? If they don’t match, keep searching the map for a junction that does.
  6. By combining the information you get from your bearings and the map with your awareness of your surroundings plus your time and distance of travel, you should be able to follow your progress and get where you want to be.

It’s easy to miscalculate the distance you have travelled and accidentally head off down a wrong spur.

Example: Right spur?

When visibility is poor, it is easy to overestimate how far you have gone and mistakenly turn onto the wrong spur. Unless you are checking with your compass, you may go a long way before realising your mistake.

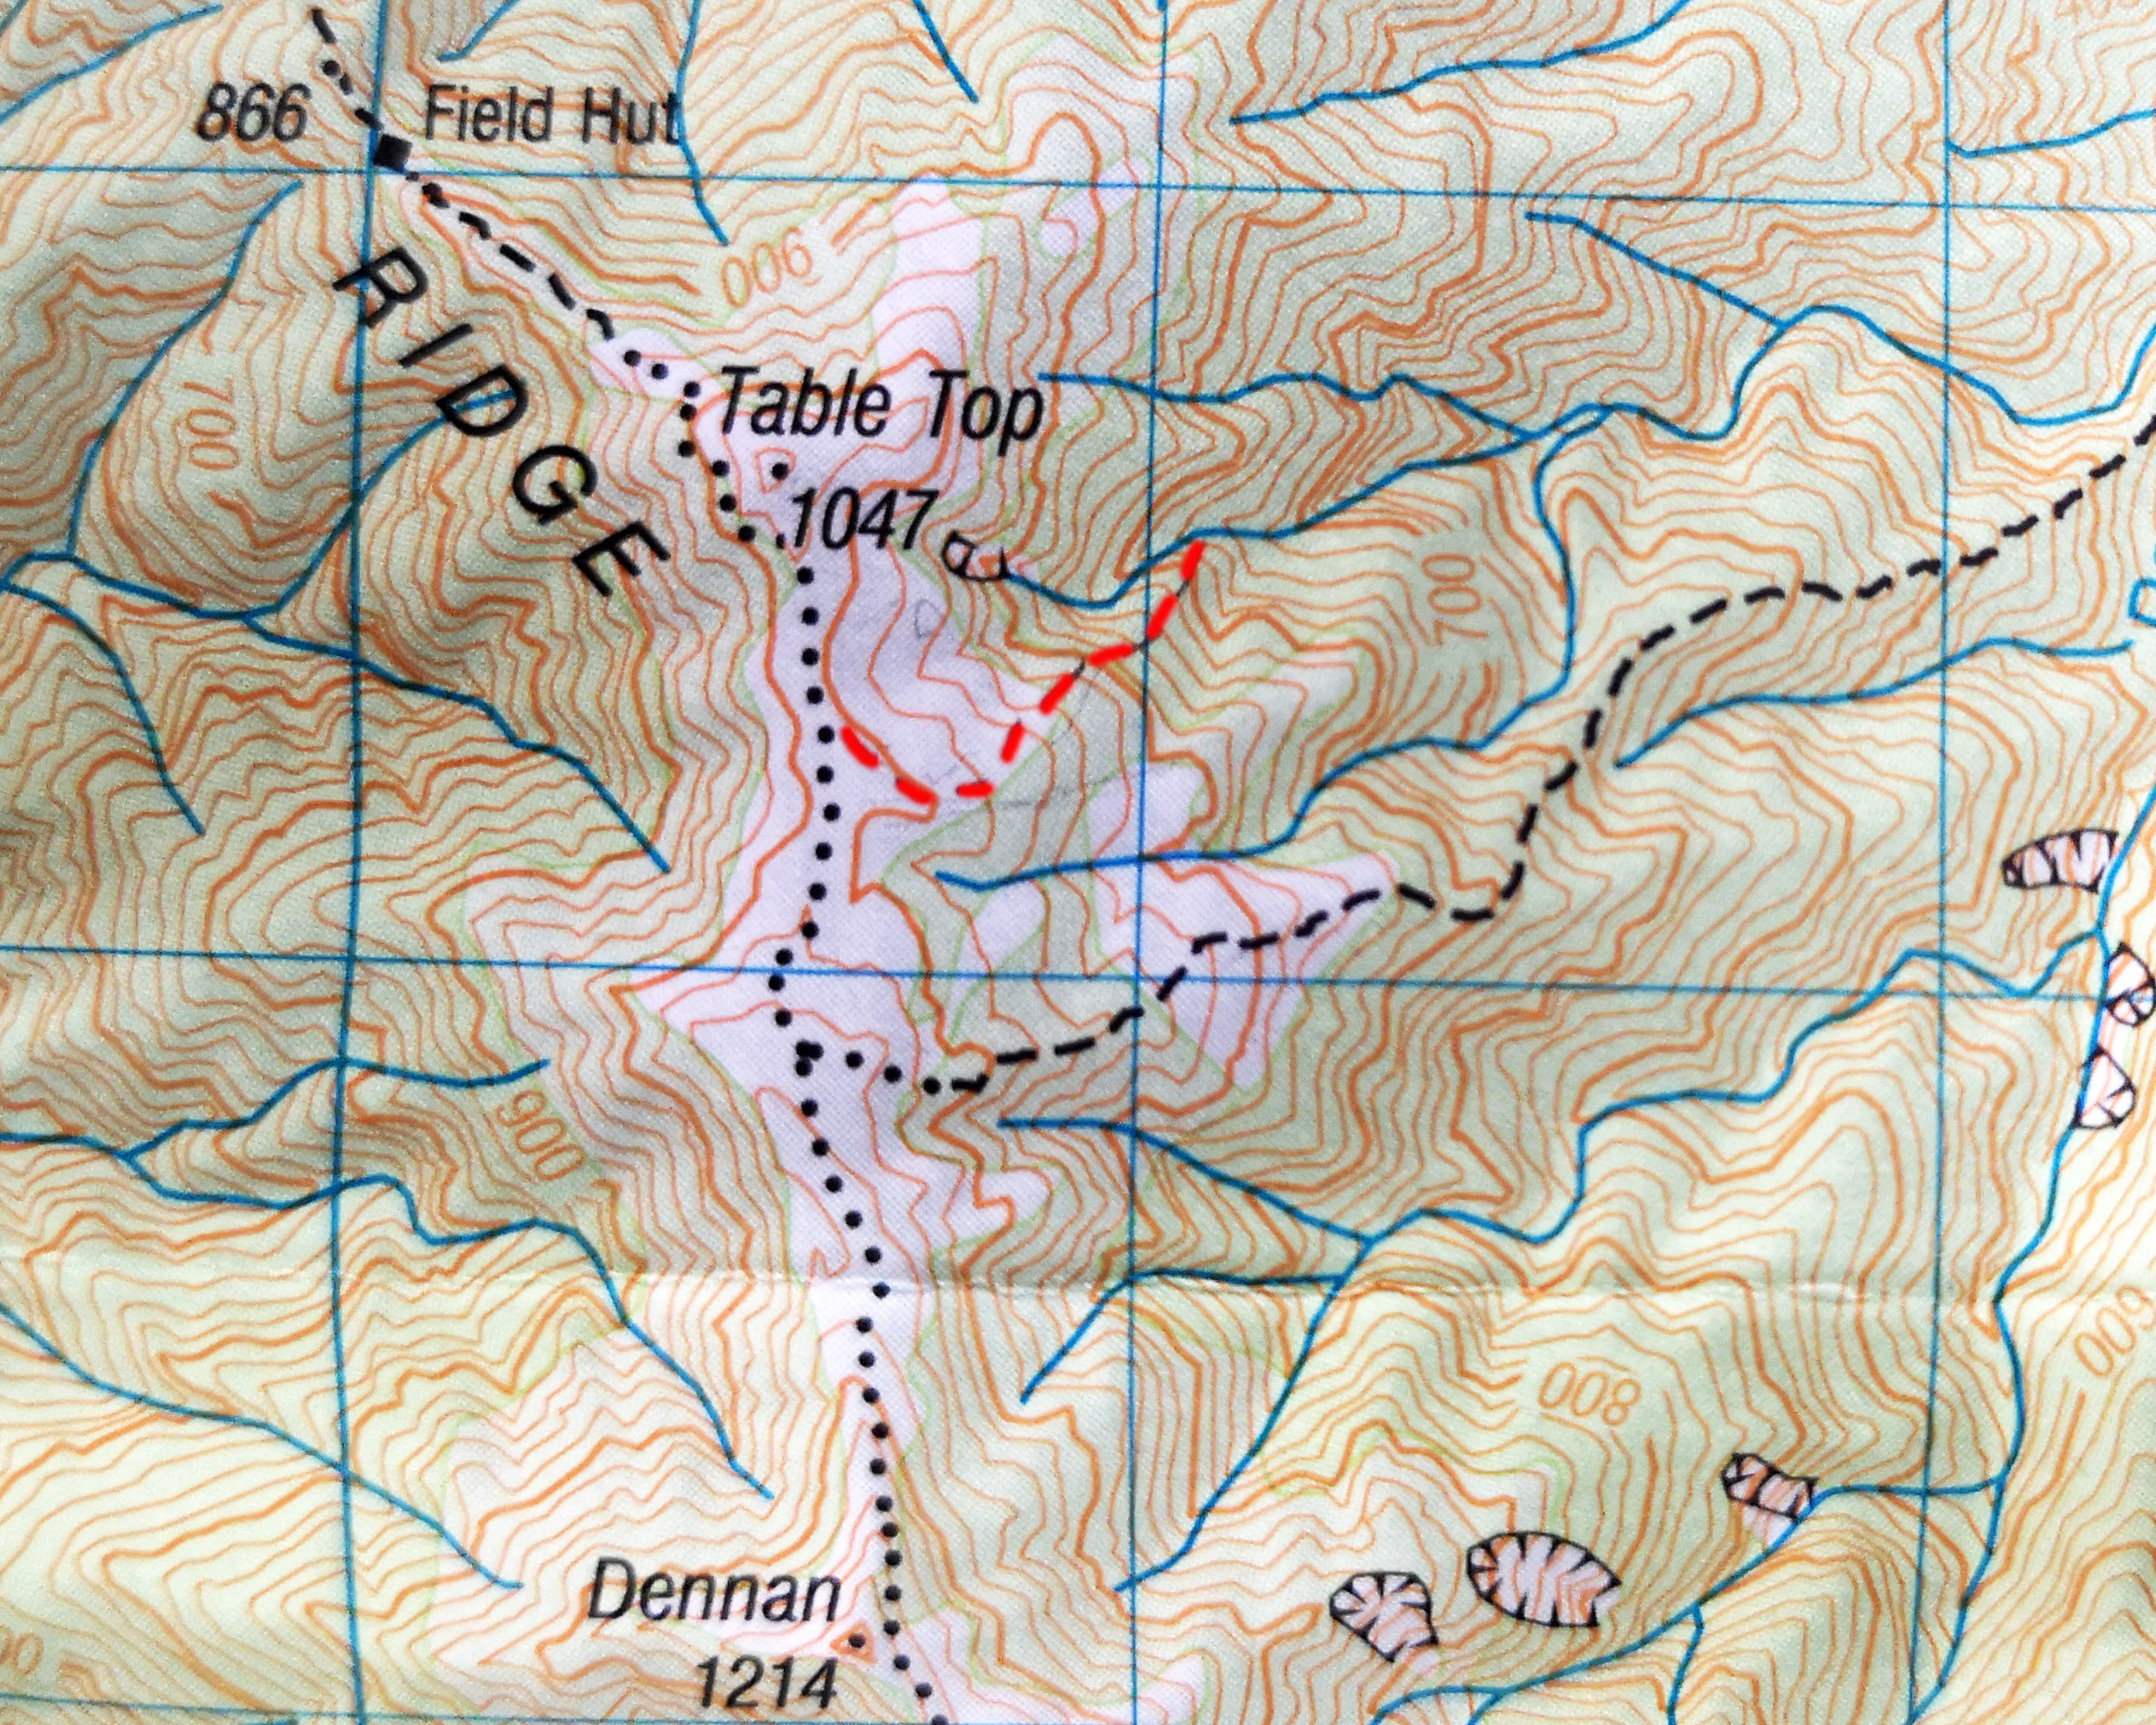
Consider you are tramping, and you think you have taken the left branching track 700m after Table Top in the map above. You check your bearing along the direction of travel and get 92°. After a few minor twists and turns you take another bearing and get 104°. A few turns later you get 116°. Add the three bearings together, and divide by three to get an average bearing of 104°. You check the map and identify the track fits that bearing.

But in taking a second look, you realise you might also be on an earlier spur (red track on feature photo). If you are on the correct spur you expect to turn to a bearing of about 70° after about 200m whereas the bearing of the wrong, red, spur is more like 50°.

Keep an eye on the compass to ensure you are on the right track. Take special care around the 800m mark that you take the spur with a bearing of 30° rather than the 70° one.

– Noel Bigwood is an instructor with Outdoor Training New Zealand