View our visdeo tutorial at the end of this article.
To begin, you need to take a bearing to a natural or manmade feature you can identify:

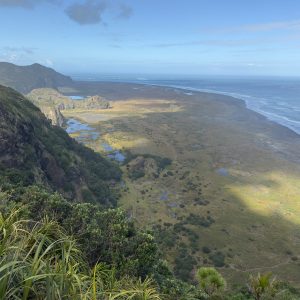
1. Open your map and identify features you can see in the landscape.

2. Check at the bottom of the map for the magnetic variation (the illustrations in this exercise are using a variation of 21-degrees.

3. Stand and point the direction of travel arrow on your compass towards a feature you have identified. Set the grid bearing of this feature by rotating the dial till the red magnetic needle points to the magnetic variation.

4. Put one front corner of the compass on the map on the feature you took the bearing from. Then, keeping the corner there and without moving the dial, move the compass around till the orienting lines on the base of the dial line up with the north-south grid lines on the map. Ensure the arrow inside the dial is to the top of the map, remember that the top of the map is north.

5. Look at the map, or mark with a pencil, along the edge of the compass back towards the base of the compass. You should be somewhere along that line. If it crosses a linear feature (ridge, track, river, etc) that is a second point of reference.

6. To refine, repeat Steps 3, 4, and 5 with other features (preferably at least 45-degrees from the first).

7. Your technique is perfect if the three lines meet, hence the term triangulation. Often, they don’t quite meet, and you have a triangle of error. The bigger the triangle the greater the error.
View our video tutorial to help you master the art of triangulation:
https://youtu.be/3Tw1UiMyvxU

34 years of inspiring New Zealanders to explore the outdoors. Don’t miss out — subscribe today.

Questions? Contact us