The old adage ‘you don’t know what you don’t know’ rings especially true for outdoor skills. Most of us learn our way through the backcountry by experience, picking up tricks from friends, clubs or guides. But we all have gaps in our outdoor knowledge. The problem is, we don’t often realise what those gaps are until we encounter a situation where they’re put to the test.
Wilderness has joined with Wanaka SAR, a team of 80 highly-skilled volunteers, to walk us through common mistakes they see people making. In 2014/15, the Wanaka SAR team responded to 54 call-outs, 90 per cent of which occurred between November and March. Those are just the situations they know about; they don’t have any statistics measuring how many people got by on good luck, rather than good management.
“Our basic message is that we’re all in favour of people getting into the outdoors, but know what your limitations are and take reasonable precautions,” says Phillip Melchior, former Chairman of LandSAR New Zealand, the umbrella organisation with which Wanaka SAR is affiliated.
Hopefully these articles will serve as a refresher course, with a few tips and tricks to help keep you safer while you’re out exploring New Zealand’s stunning landscapes.
River crossings
River crossings are my weakness: I’ve never received any formal training and the advice I’ve had has often been conflicting.
I’m not alone. The New Zealand Mountain Safety Council reports an average of three river-crossing deaths a year.
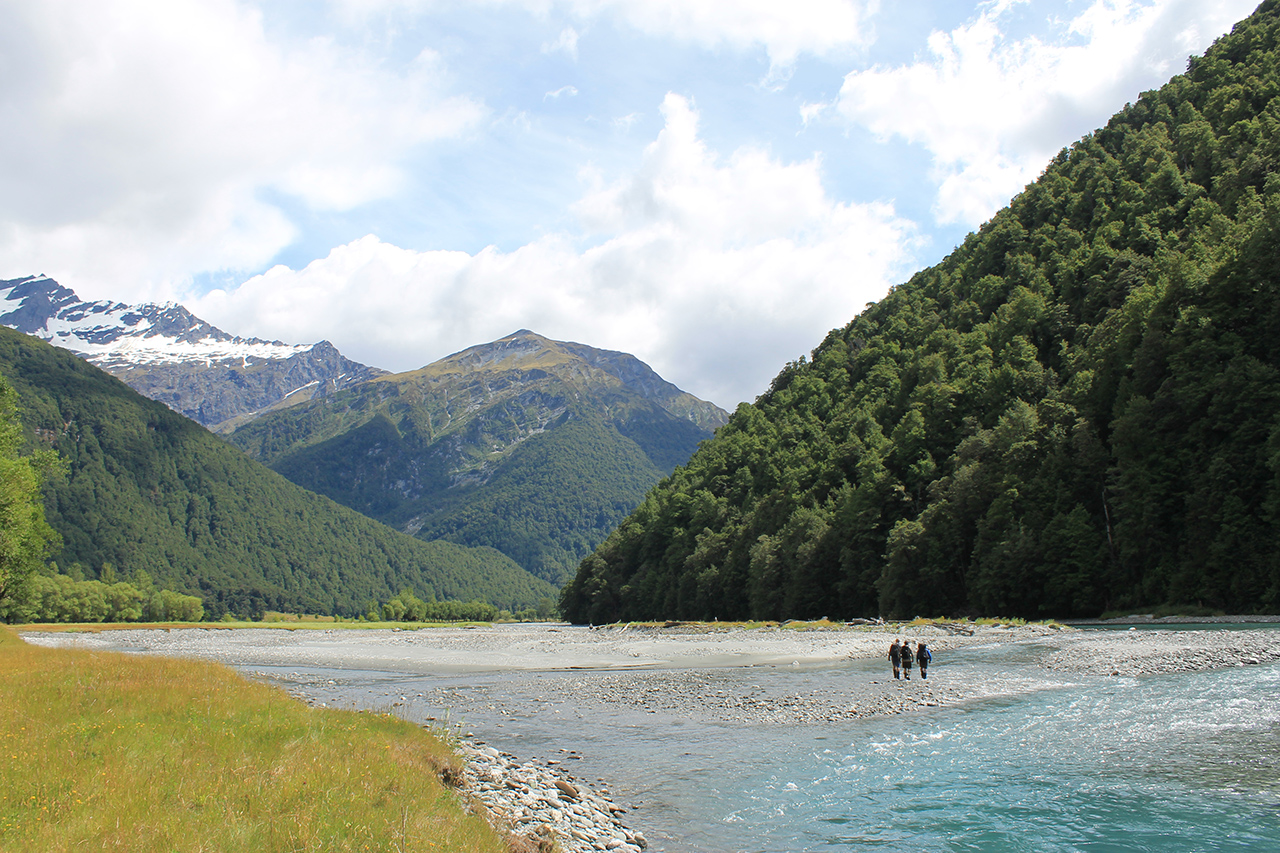
In the braided mouth of the East Matukituki River, four members of the Wanaka SAR team – Bill Day (Chairman), Paul Sutherland, MJ Johnston, and Roy Bailey – have volunteered to walk me through the basics.
“The problem with water is that when things go wrong, they go wrong quite quickly and quite badly,” says Bailey. “One cubic metre of water equals one ton of weight. This river we’re crossing today is flowing at a rate of around 10 cubic metres, which is 10 tonnes of weight moving past every second. The force of water is greater than people imagine. Things happen fast and decisions are time critical.”
The biggest mistake the Wanaka SAR team sees is people not assessing the river before they cross. “I saw one couple crossing without even taking a pause,” Johnston says. “They weren’t walking together, they were carrying heavy packs, and they took their boots off. Her partner crossed first and was sitting on the bank dusting off his feet, not even paying attention to her. It was everything you shouldn’t do.”

1. Stop and assess the river. Aim to cross at the widest point, and avoid steeper sections (any kind of rapid).
2. Find your exit point. Look for a wide, flat exit, rather than a bank. “Banks indicate the current is ripping against the side,” Bailey says. “Pick a place downstream: work with the current.”
3. Make a plan for what you’ll do if you can’t make it across. Is there a wide, flat exit downstream from where you’re crossing? “Leave yourself room to turn around if you don’t like it,” Sutherland says.
4. What is your worst-case scenario? “Make sure there isn’t a terrain trap downstream, like trees, boulders, or rapids,” Bailey says. “Trees are the number one hazard in the river. If you fall, that’s where you’re going to get swept to.”
5. Look for any other helpful information: “Nine times out of 10, if you can’t see the bottom, you shouldn’t go in,” Johnston says. “And look for other indications – rock flour and didymo, for example, can be slick-as.”
6. Choose a group leader and make a team plan to cross the river. “The lead person makes the decisions,” Johnston says. “Talk about a game plan and if there are any kids with you, make sure they know the plan, too. Kids bob down river like corks, you’ll never catch them, so they need to know what to do if something happens.”
7. Adjust your gear. Always keep your boots on. “A lot of people we find downstream don’t have boots,” Johnston says. “People will go out of their way to keep their feet dry, and if you slip, if you get it wrong, it’s a big hazard.” Secure any loose items inside your pack; there shouldn’t be anything dangling off the side. Keep your pack on, but loosen the waist belt, and undo the chest strap. “That way, your pack can act as a flotation device, but it’s easy to ditch if you need to,” Sutherland says.
8. Link up. “Put strong people on each end,” Johnston advises. “Often taller people can get really good pressure on the river bed. Place your arm between your partner’s back and pack, and grab hold of their waist belt. Hold low, rather than high. Any taller people should fit the shortest person’s stride, and find a nice, easy rhythm. Take it slow.” If the group is swept off its feet, unlink.
9. If you’re going across the current, Johnston advises turning your toes slightly upstream to reduce the amount of friction on your boots. Try not to splash in your partner’s field of vision, and keep glancing upstream to see if any debris is floating your way.
10. Don’t release your partner until you’re on dry land on the opposite side.
“New Zealand rivers are very cold,” Johnston says. “Cold shock makes people hyperventilate, panic – they’re not thinking clearly, and that can happen even in knee-deep crossings. Before every river crossing, stop, assess, and discuss. Even that discussion can get you mentally prepared and focused.”

Hiking solo? Bailey advises crossing with one pole. “I like to keep it upstream of myself, leaning into the current. Move the pole, brace, then move your feet. Always have two points of contact.”
Lose your footing? “People’s first reaction is to try and get back on their feet, but they should get off their feet and swim to shore,” Bailey says. “Foot entrapment is a big problem: you try to stand up, your foot gets caught and the river keeps pushing you forward.”
If you do get swept with the current, “lean back into your pack and point your feet downstream,” Johnston says. “Bicycle kick your legs to push off any obstacles, keep your arms wide for stabilising, and work to get where you want to go. The river won’t take you where you want to go; you have to get yourself there. Until then, there’s no harm floating in the centre of the river.”
Need to turn around as a group? “The person upstream bends around and slowly walks down the line, facing your mates, almost forming a huddle as you do so. You never want to be more than two people wide in a river. By huddling you stay in a stable group. Then the next person starts to come around, and then next, until you’re facing the bank you just came from,” Johnston says.
“Rivers go up very quickly, but remember that they also go down very quickly,” Sutherland adds. “Spending a cold night waiting for the river to go down is infinitely better than drowning. Don’t put yourself in a situation where you’re time-pressured to cross, or take risks because you get finish-line fever.”

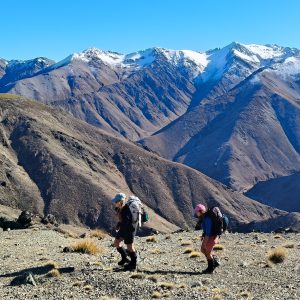
Decision points
“A decision point is where you actually make a decision on which way you’re going to go, or what you’re going to do,” Bailey says. “You may be hiking a bush track and suddenly you’re mountaineering. Do you go ahead, or turn back? That sort of thing.”
The biggest mistakes the Wanaka SAR team sees people making are putting themselves in time-constrained situations, not seeking or heeding local advice, pushing their boundaries, or taking shortcuts.
“People plan a trip a long way out and they’re going to hold to their time-frame no matter, whether Mother Nature plays ball or not,” Johnston says.

Around the Wanaka area, there are three “notorious” locations the Wanaka SAR team are all too familiar with. “Cascade Saddle, Gillespie Pass and Rabbit Pass all have a short period of critical high intensity risk, and people often push through due to the time constraints they put on themselves, or they feel they’ve come too far to turn back,” Johnston says. “They take on conditions they’re not prepared for.”
On Cascade Saddle, trampers emerge from a bush walk into an alpine environment. “There’s always a snow patch, and most people don’t have crampons or ice axes. If it’s raining, the snow grass gets very slippery, and people can’t stop themselves once they’re sliding. We have a fairly standard operating procedure for Cascade Saddle call-outs by now,” Johnston says.
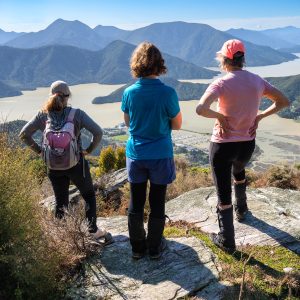
Another troublesome area for the team is people taking shortcuts. “We’ve had people get into trouble on Roys Peak because they followed an animal track back down, usually because they stayed too long trying to take a picture of the sunset,” Sutherland says.
“It’s simple: leave yourself enough time to adapt to the conditions,” Bailey says. “ Usually when people get into trouble they’re not thinking ahead. Get advice, leave time to adapt your plans, and walk through the what-ifs before you make a decision.”
Location devices
The Wanaka SAR team never knows what they’re dealing with when a personal locator beacon is activated. “There are lots of examples of Party B (which has a beacon) coming across Party A (which doesn’t), and activating their beacon on the other’s behalf,” Bailey says. “Most people who activate a beacon usually need our help. It’s only a very few times that they’re cold and wet and want a ride.”
With many location devices on the market, and technology changing quickly, the type of location device you choose should suit your needs, but the biggest mistakes the Wanaka SAR team sees are people not carrying a PLB, especially on day-hikes, and not leaving intentions.

If you purchase a beacon, register it with the Rescue Coordination Centre New Zealand (RCCNZ). RCCNZ will ask you to nominate four people. If activated, the first thing RCCNZ will do is call the first person on your list and ask about your intentions. This will potentially dictate the response, so nominate people you will always tell your intentions to.
The minimum information you should include is where you’re going, what you’ll be doing, when you can expect to be back, the number of people in your party, any medical issues, what your Plan B is if you get into trouble, and the ‘panic date’ to call in the cavalry if your contact hasn’t heard from you.
“Listing intentions is a huge part of it,” Bailey says. “The more information we have to go on, the better prepared we are to help. But you still need to help us help you.”
The Wanaka SAR team recommends the following basic steps to help yourself get rescued.
1. Have your PLB in an accessible place.
2. Find a clear place to activate your beacon. (Avoid hut interiors and heavy tree cover.) There aren’t many satellites in the Southern Hemisphere, so it might take longer for the signal to be picked up.
3. If you’re using a Spot device, and you’ve stopped to wait out the weather, let people know so they don’t think you’re in trouble.
4. Most rescues are helicopter searches, so find a way to get noticed. “Sound and light are how we usually find people,” Sutherland says. “Or get into a clearing if you see the helicopter; don’t hang out in the treeline and wait for us to spot you.”
5. Look after yourself after you’ve turned on the PLB. “You might have to wait a few days, especially if the weather is bad,” Bailey says. “Stay warm, stay dry – self-rescue.”
6. Don’t trust your phone. “Batteries die quickly. Put the thing on flight mode and use it only when you need it,” Sutherland says. “It’s no substitute for a PLB, just like GPS is no substitute for a map. Your phone can be helpful, but don’t rely on it.”
7. Don’t wait to activate your beacon if you need help. “We would much rather go out and pick people up in the afternoon than doing it at night and have them get in a situation where it’s escalated,” Bailey says.