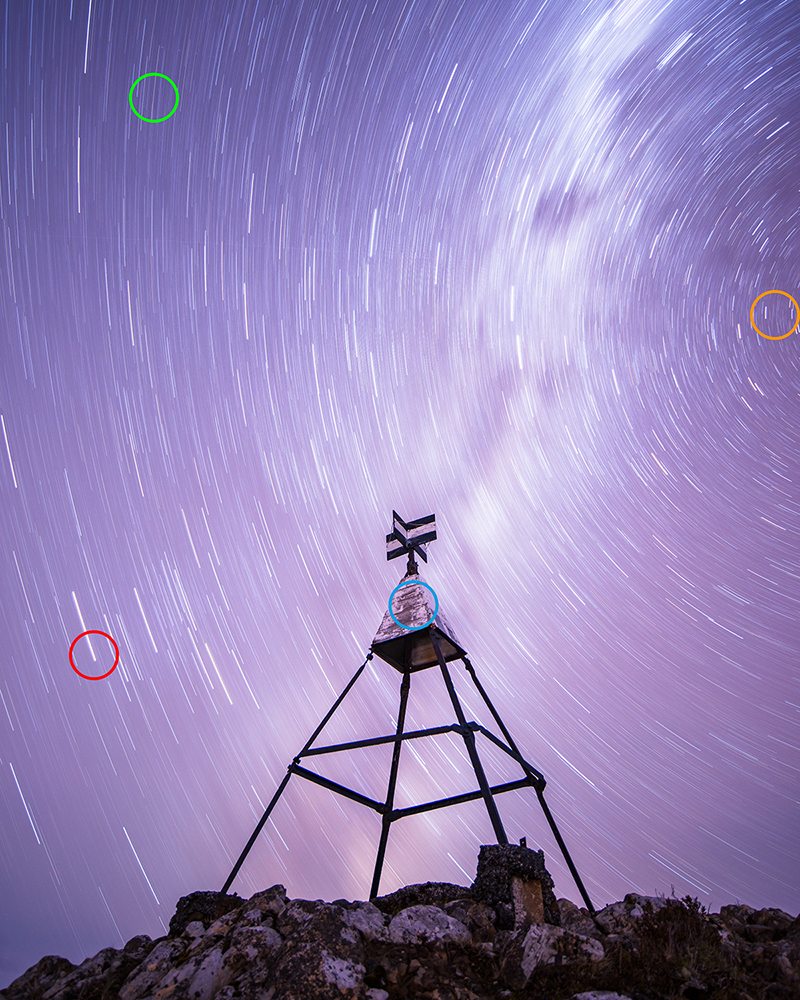
Capture the night sky in a unique way with these star-trail tips from Richard Young
Foreground
The stars on their own will not provide a very interesting photograph, so find a good foreground like a trig station. With the lack of light, the foreground may show up as a silhouette. If you want to have your star trails over a well-lit foreground, you will need to photograph under a part moon or use your headlamp to light the subject.
Find a dark sky
For best star-trail photographs you will need to find the darkest sky possible. Most national parks, far from the light pollution of the cities, offer stunning views of the night sky. For the darkest skies, time your shoot for near or during a new moon.
Location of stars
The direction in which you shoot will determine the shape of the star trails in your final image. If you include the south celestial pole in your composition, all the other stars will seem to be spinning around this central location, which can create a strong anchor point in the photograph. You can use a star app on your phone or a compass to find the location of the south celestial pole.
Star-trail settings
To capture star trails you will need a tripod, a long exposure of at least 30-minutes and the shutter speed set to ‘bulb’ in manual mode.
Use the following settings in manual mode (M):
Aperture: Widest possible (f/2.8-f/5.6 depending on your lens) ISO: 100 or 200 Shutter Speed: 30 min+ (bulb) Focusing: Manual/infinity
How Richard took this photo
Location: Te Ara Tirohanga (Rimutaka Trig Track), Rimutaka Forest Park
Settings: Nikon D800E, 18mm lens, ISO 100, f3.5, 30 minutes
Special tools: Tripod
– Richard Young is a Wellington-based photographer running photography workshops in Tongariro National Park
The Wilderness 40 Best Huts: 12 Top North Island Huts
Takorika, Havelock Water Supply Reserve
Zion Hill Track, Waitākere Ranges Regional Park
Subscribe!
Each issue of Wilderness celebrates Aotearoa’s great outdoors — written and photographed with care, not algorithms.Subscribe and help keep our wild stories alive.