


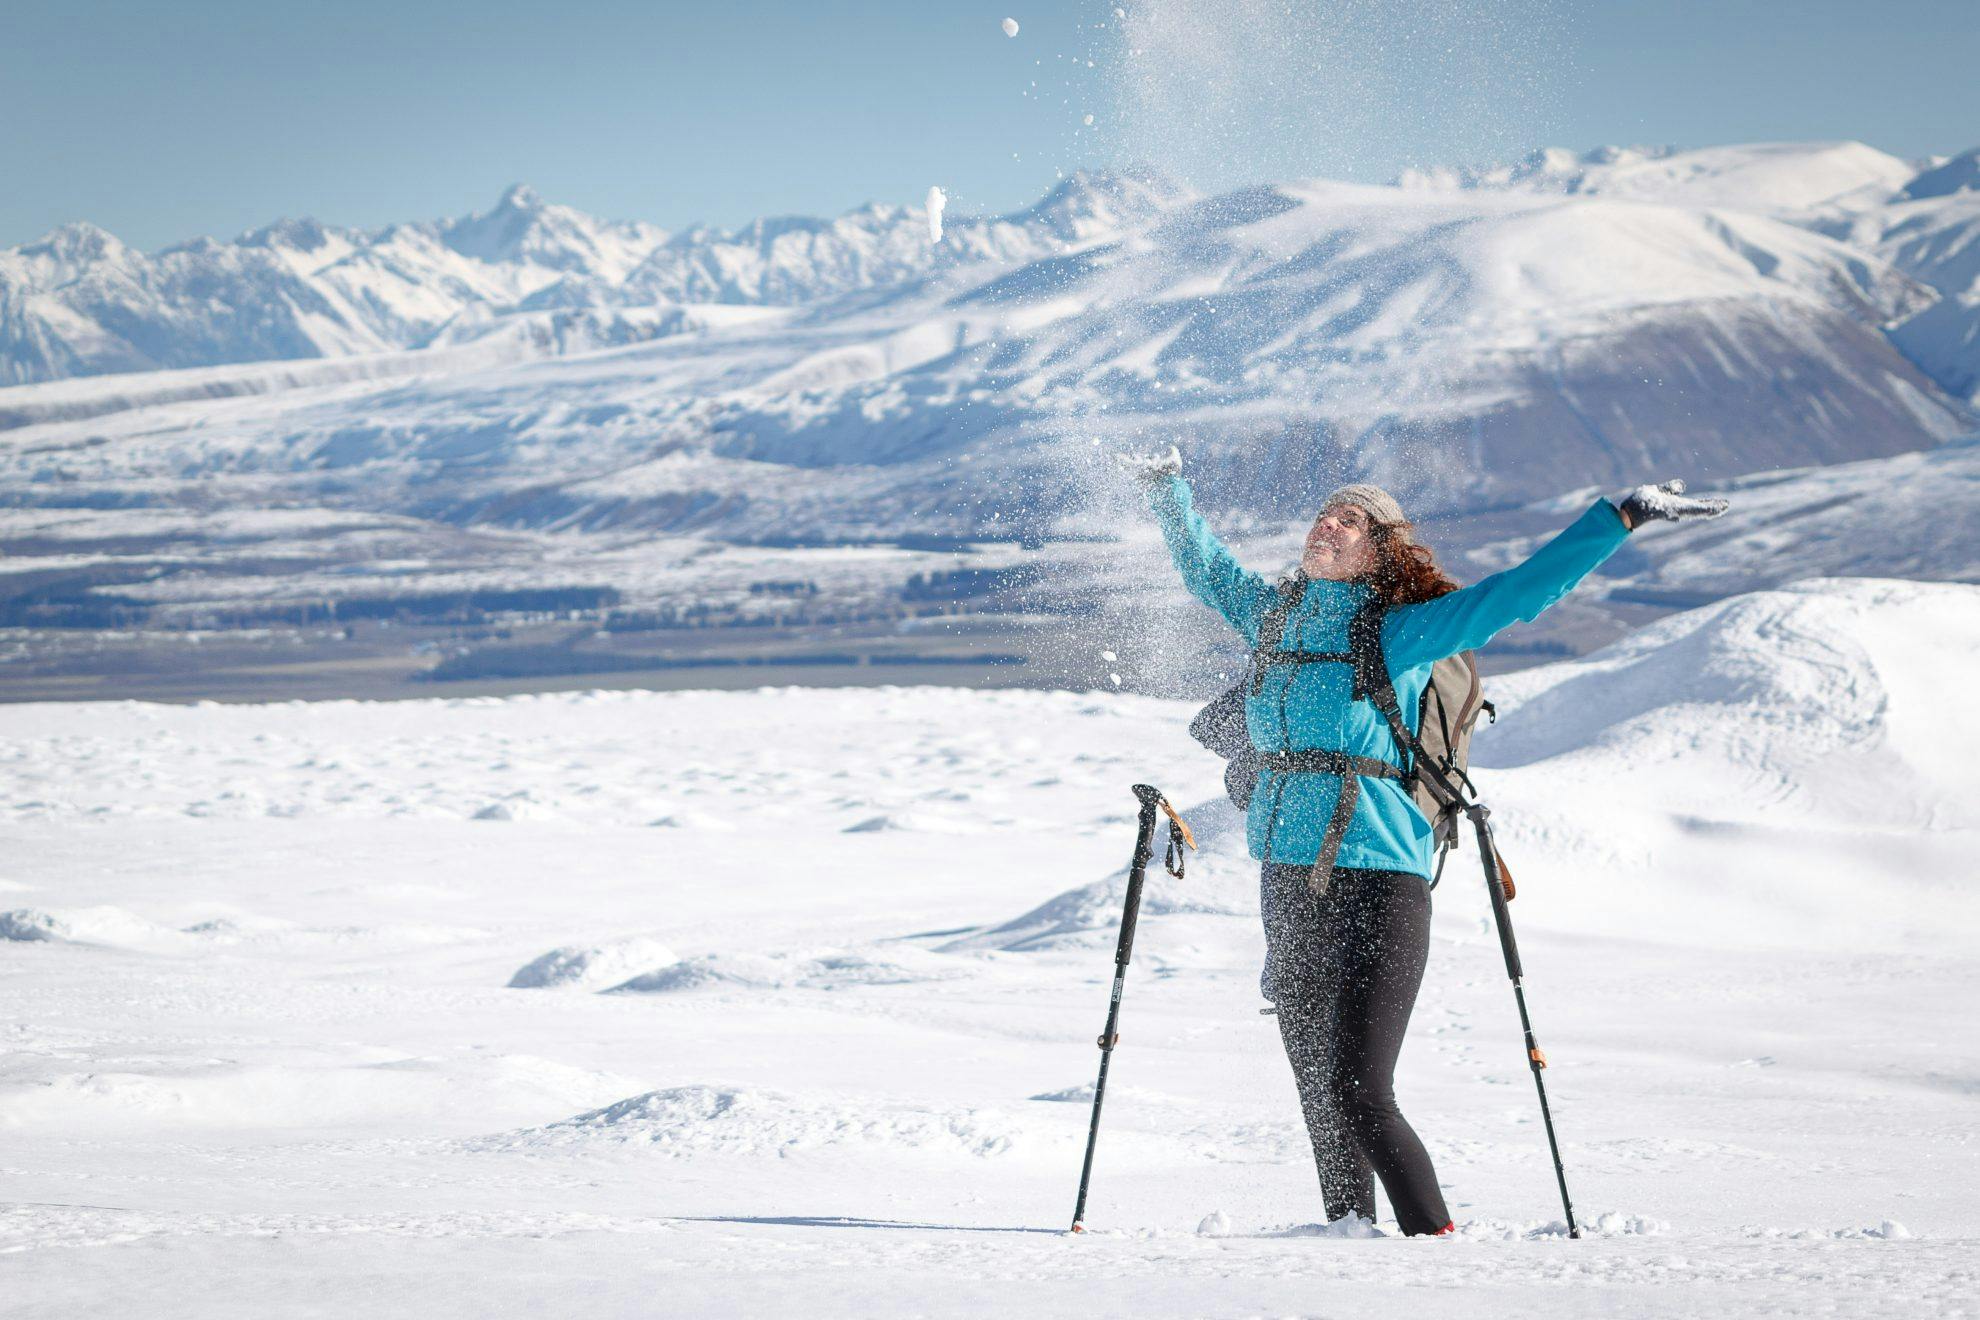

The thought of a cold winter walk sends a shiver down many people’s spine. Which is one reason to give it go: you could have an entire track and series of huts to yourself. The changed landscape, the challenge and sheer beauty of snow-covered mountains and trails are other reasons to load up your pack.
Winter is a special – maybe my favourite – time to head into the hills. The river swims, shorts and endless days of summer are replaced with the crispness of the snowpack, fresh air and long evenings sipping hot drinks.
Tramping in New Zealand’s ranges at this time of year isn’t all about postholing through a loose, crusty snowpack over the top of thigh-high tussock. Picking the place and time can help you avoid the worst of the grovelling while making the most of the good things about winter: the mountains take on a particular beauty with the winter snowline, frosty mornings and icy puddles; the tracks and huts are quieter; there’s no vermin to nibble your snacks and winter usually brings clear and settled spells of weather.
You don’t need to be equipped like an arctic warrior to cope with the cold either. Most summer tramping kit, supplemented with some extra clothing and equipment, will do.
Equipment
The staple extras for winter tramping are cold-weather clothing and tools like an ice axe and crampons.
Clothing
Lower temperatures and cold wind make an insulated jacket essential. It’s rare that you’ll need to walk in one, but they make all the difference for downtime and lunch breaks.
Looking after your hands is important, too. Chilled fingers will impair your ability to do simple things, like changing clothes or eating and drinking, which can increase susceptibility to hypothermia, as well as exposing your fingers to cold injury in general. I use a liner glove so I can still perform fiddly tasks and I’ll wear a softshell or lightly insulated glove over the top. It’s wise to carry a burlier pair of mittens or ski-style gloves for travel in nasty weather.
Gaiters not only stop snow getting in the top of your boots, they help keep the whole lower leg warmer, including your feet.
Neck gaiters have become a favourite item of mine. There’s not much fat on your neck but lots of blood moves through it, so keeping this part of your body warm makes a big difference. It’s usually the first thing I add if I’m wearing a base-layer and a shell jacket and am still not warm enough.
Often the same boots you use in summer will do for winter adventures, but ensure they are stiff enough to safely take crampons – this means using a pair of three-to-four season boots. If you’re not sure, take them to an outdoor store for an opinion. Boots should be sized so you can wear a thicker sock than you might wear in summer.
Long socks that fit over the calf will help keep your feet warm. If creek crossings and wet feet are expected, thin neoprene dive booties (with no tread on the sole) are a real toe-saver and make life much more comfortable.
For trips that don’t involve water crossings, a pair of softshell hiking pants will block the wind and in really bad weather you can still wear waterproof over-trou over these.
Hardware
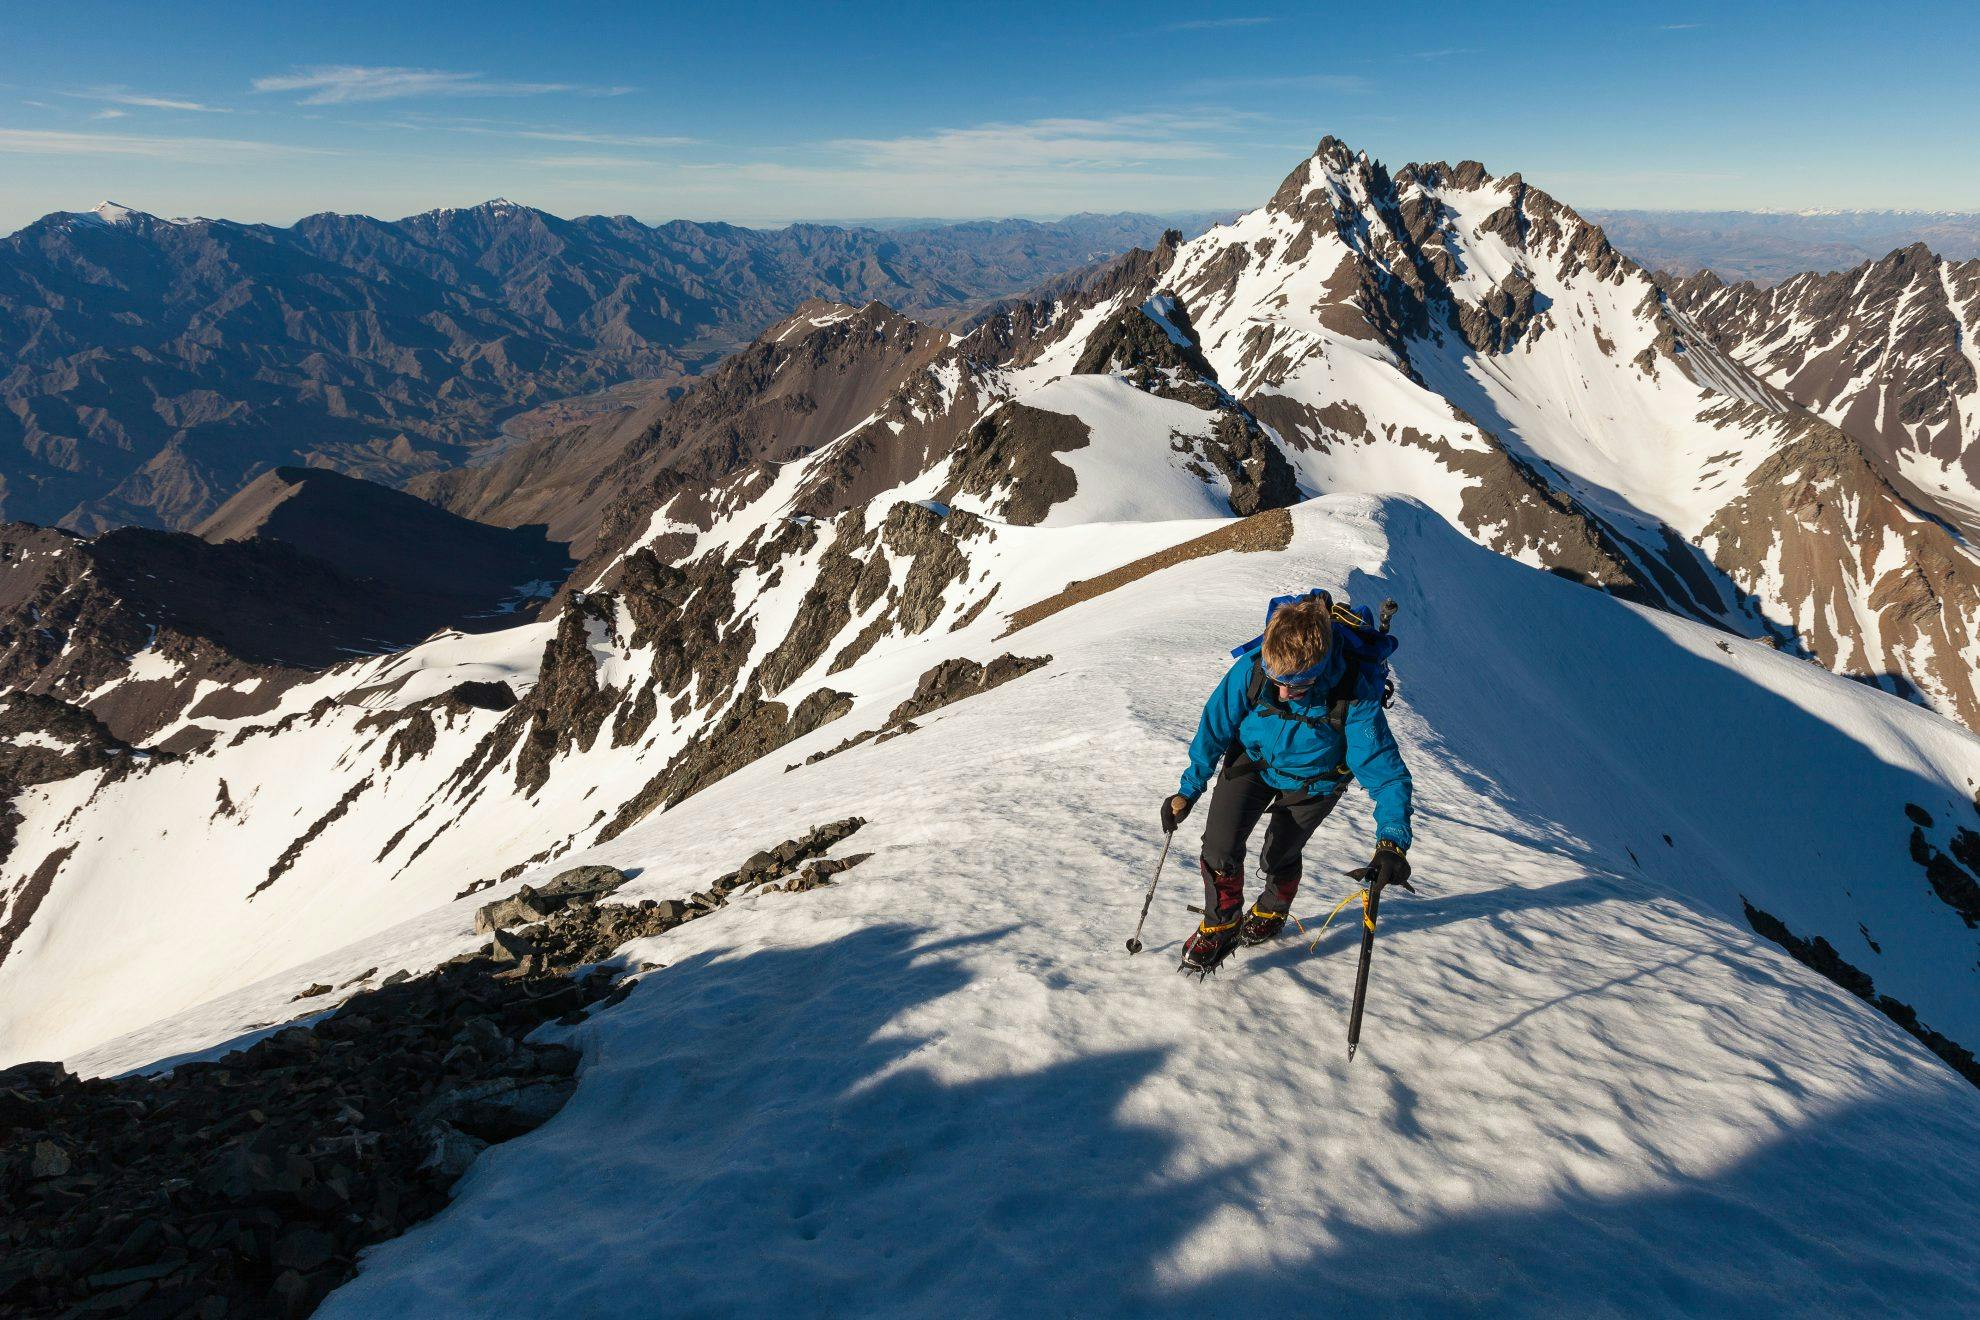
For winter travel above the bushline, an ice axe and crampons are essential while there is a snowpack. It only takes one steep gully or an exposed icy patch to justify carrying the extra weight. At times, only an ice axe might suffice, as you can use this to cut steps if need be.
Look for a ‘walking axe’ that is long enough so you don’t need to lean over for the ferrule (the pointy end) to contact the slope. Maintaining balance is key to safe travel on snow and ice, so seek expert advice when choosing an axe. If it’s too long or short for your intended use, it will be awkward to use.
Crampons are typically steel and come with a variety of different bindings. Make sure the binding method will work with your boots and try different brands and models for the best fit. For light duty, consider an aluminium pair. These are not suitable for walking on rock and do not penetrate hard ice well, but they are great when there is a full winter snowpack or for short tops/snow crossings.
At least one walking pole makes walking in deeper snow a bit easier and also helps maintain balance when used in combination with an ice axe.
In full winter conditions, with a fresh or deep snowpack, snowshoes can make or break a trip – but plan and research accordingly: they’re a heavy item if it turns out you don’t need them.
If you are intending to camp above the bushline, a snow shovel can greatly speed site preparation.
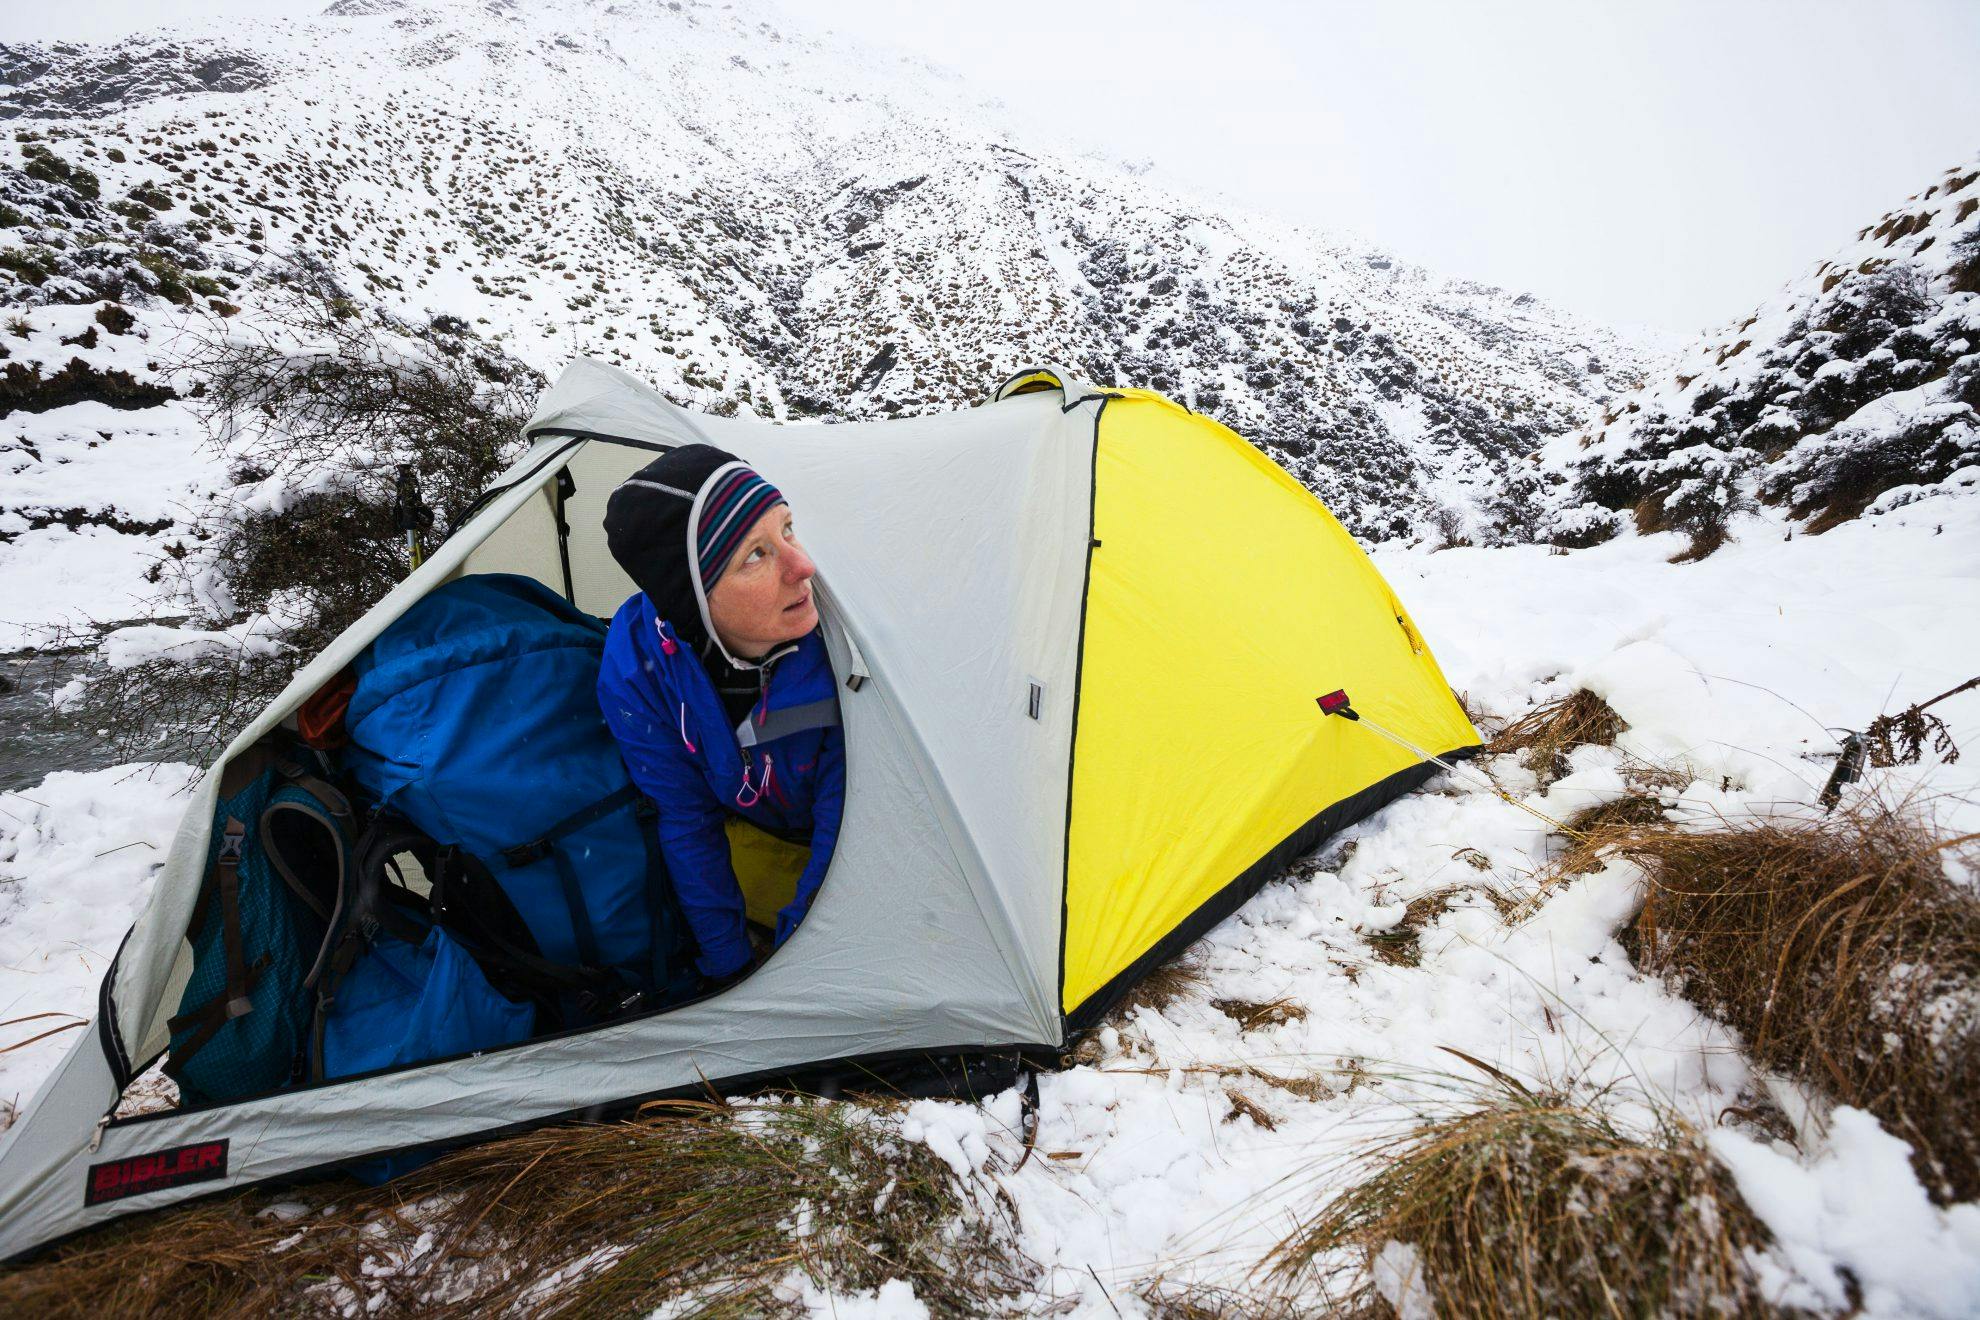
Tent and Sleeping Bag
A standard three-season tent will do for winter tramps up to the bushline, but if you’re venturing beyond, a four-season tent designed to handle snow-loading is advisable. Single pole tents might suffer in these conditions, while those with two or more poles that cross at the apex are generally stronger. If you plan to winter tramp often, look for a tent that doesn’t have mesh walls (they let wind and spindrift through, and won’t be as warm).
A down sleeping bag with a hood, neck muff, and a temperature rating to -10℃ should be sufficient to keep you warm for most New Zealand winter tramping. If you intend to stay in huts, a -5℃ bag will be enough. A lightweight waterproof/breathable outer fabric and water-resistant down will help combat damp conditions for bivouacs or camping. If your bag isn’t quite warm enough, or you’re a cold sleeper, a silk sleeping bag liner adds warmth.
A thin section of closed cell foam, used with an inflatable mat, will help insulate you from the cold ground while sleeping and is handy for sitting on during lunch.
Skills
Familiarisation and practise with ice axe and crampon technique is essential when you’re venturing onto the tops. It’s no use carrying this equipment if you don’t know how to use it.
Self-arrest should be an automatic skill that you can use whichever way you are falling down a slope, including with a pack on. But the best maxim is: don’t lose your balance in the first place.
Route-finding skills on snow-covered slopes is another essential for above the bushline tramping: know how to pick a safe line that avoids unnecessary exposure to terrain traps like bluffs and steep gullies, and make sure everyone in your party is confident and skilled in such terrain before heading out.
If you’re camping on the tops, consider your site selection for wind exposure, avalanche and rockfall, and falling hazards on exposed slopes.
Hazards
Avalanche
You don’t have to be above the snowline to be exposed to avalanche risk – big avalanches can run right to the valley floor and many tramping regions have tracks that cross avalanche paths. That’s why it is important to be aware of current snow conditions and avalanche risk.
The majority of avalanches that result in burial are self-triggered. During storms and for the first 24 to 36 hours after snow stops falling are the riskiest times. The best place to get an overview of current avalanche risk for the mountains is www.avalanche.net.nz.
For travel in avalanche prone areas, a transceiver, probe and shovel should be carried, along with the knowledge of how to use them.
Hypothermia and frostbite
Low winter temperatures increase the risk of cold damage to extremities and while frostbite is rare at typical tramping elevations, it’s not uncommon among climbers. Staying hydrated is also essential. If you suspect cold damage, avoid use of the extremities; warm slowly and keep warm; cover with dressings and see a doctor as soon as possible.
Gear to help you enjoy your winter tramping
 Rab Cirrus Flex Jacket $259.95 Rab Cirrus Flex Jacket $259.95Slim fit jacket with warm-when-wet 3M Featherless insulation, stretch fleece panels on arms and sides, ripstop outer and lining fabric, fleece lined chin guard, zippered hand pockets, interior drop-in pockets, elasticated cuffs, hem drawcord. Stuffs into pocket. 360g (m); 320g (w). www.outfitters.net.nz |
 Earth Sea Sky Hydrophobia $499 Earth Sea Sky Hydrophobia $499Full-length, fully seam sealed, watertight double-flap zip with domes, double ended front zip, under arm gusset for freedom of movement, waist drawcord, adjustable hood with wire stiffened visor, external map pocket, top and side entry hand pockets. 750g (m); 630g (w). www.earthseasky.co.nz |
 Crispi Nevada Legend GTX $599.99 Crispi Nevada Legend GTX $599.99Water repellent nubuck upper and waterproof/breathable Gore-Tex insulated lining, full rubber rand, sprain-protecting ankle bone support system, PU shock-absorbing midsole, flexible crampon compatible, air mesh removable footbed. 1600g/pair. www.crispi.co.nz |
 Therm-a-Rest XTherm $429.99 Therm-a-Rest XTherm $429.99Four-season mattress with patented reflective barrier, over 100 internal cells trap warm air, 30D ripstop nylon fabric top, 50D polyester fabric bottom, stuff sack doubles as pump, repair kit. 430g. www.ampro.co.nz |
 Exped WinterLite -6 $649.99 Exped WinterLite -6 $649.99Hydrophobic and windproof shell fabric, watertight seamless construction, 540g of 800-loft European goose down insulation, for use to -6℃, 3D draft collar, comfort hood and anatomical footbox. 950g. www.bivouac.co.nz |
 Jetboil MicroMo $279.95 Jetboil MicroMo $279.95Cold-weather stove for use to -6.7℃, 800ml Fluxring cooking cup with insulating cozy, drink-through lid with pour spout and strainer, push-button ignitor, measuring cup and bowl. 340g. www.jetboilnz.co.nz |
 MSR Evo 22 Uni Snowshoes $299.99 MSR Evo 22 Uni Snowshoes $299.99UniBody Deck with integrated traction bars, weather-resistant and glove-friendly binding, crampon bars, modular flotation tails (sold separately) for added flotation over powder or while carrying heavy loads. 1630g. www.ampro.co.nz |

Exped DownMat HL Winter $349.99 |
 Outdoor Research Crocodile Gaiters $119.90 Outdoor Research Crocodile Gaiters $119.90With Velcro closure, three-layer Gore-Tex fabric, abrasion-resistant 1000D Cordura on inner leg and boot section, webbing and cam buckle top closure, reinforced boot lace hook, triple bartacked webbing instep straps. 289g (m); 252g (w). www.bivouac.co.nz |
 Macpac Torlesse 50 V2 $329.99 Macpac Torlesse 50 V2 $329.99Featuring Macpac’s AirFlo load carry system, 630D Cordura nylon fabric, dual axe attachments, lid pocket, front pocket, twin side pockets, base compartment divider, hydration exit port, rain cover. 2300g. www.macpac.co.nz |
 Marmot Helium $999 Marmot Helium $999With 800+ fill power goose down with hydrophobic coating, for use to -9℃, anatomic footbox, full length two way zipper, multi-baffle hood, internal stash pocket, snagless insulated draft tube.935g. www.marmotnz.co.nz |
 MSR Operator Snow Shovel from $164.99 MSR Operator Snow Shovel from $164.99Utilitarian D-handle, large serrated blade for scooping and hauling, rapid-deploy two-section telescoping shaft, flat back for smooth snow pit walls. 84cm (packed: 62cm). 750g. www.ampro.co.nz |
 Marmot Fortress 2P $549 Marmot Fortress 2P $549Full fabric canopy with top vent and two half mesh D-doors, seam-taped fly with top vent, vertical internal walls provide headspace and large sleeping area, extra guy lines, lampshade pocket. 2315g. www.marmotnz.co.nz |
 MSR Access 2 $1299.99 MSR Access 2 $1299.99Two-person, four-season tent designed to resist strong winds and snow loading. Large interior space, easy-to-pitch unified frame, two doors and vestibules. 1980g. www.ampro.co.nz |
